Encoding

What Is Encoding?
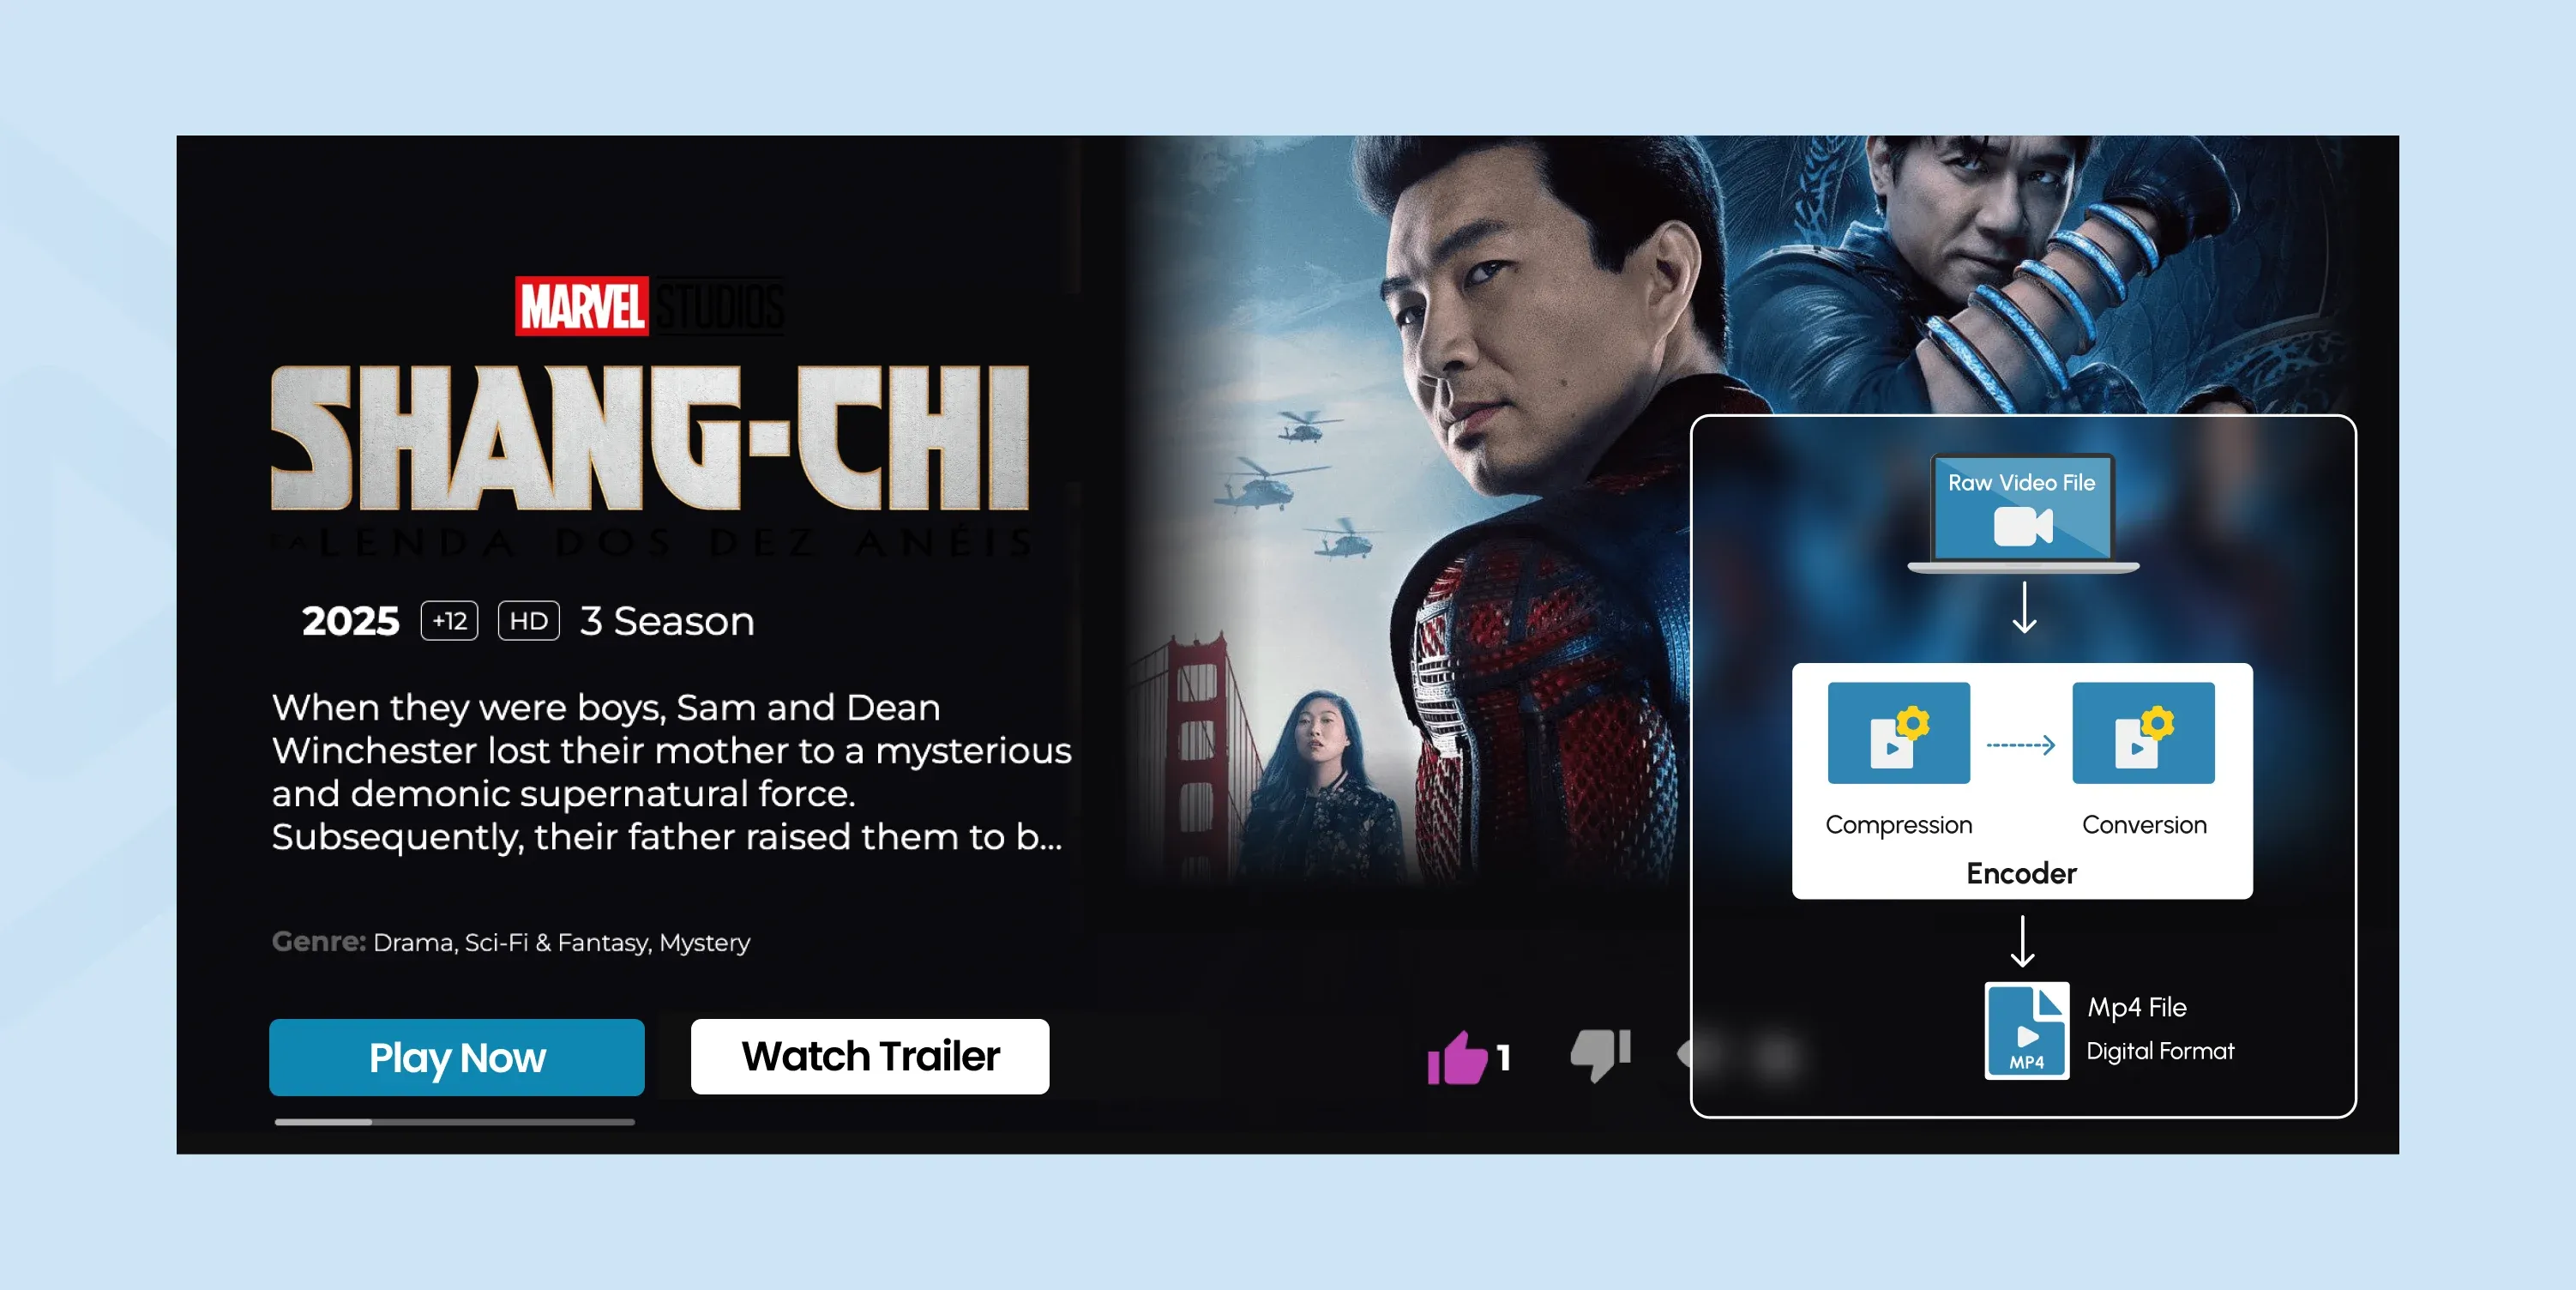
In the context of video streaming, encoding is the process of compressing raw video and audio data into a digital format suitable for storage, playback, and transmission.
Encoding is a fundamental process in digital video production and distribution. It makes video files smaller, viewable across devices, and suitable for streaming or download, all while trying to retain the best possible visual and audio quality.
Without video encoding, it would be impossible to stream, share, or store any video content.
Types of Encoding
There are three main types of encoding based on purpose and performance: Lossy, Lossless and Real-time.
Lossy encoding removes some data to reduce file size, often without noticeably affecting visual quality. It's commonly used in streaming, online video platforms, and consumer media formats.
Lossless encoding preserves all original data, making it suitable for professional video editing, archival, and scenarios where quality cannot be compromised. Files are larger but retain full fidelity.
Real-time encoding happens instantly as the video is being captured or streamed. It’s typically used in live streaming, video conferencing, and broadcast workflows. It prioritizes speed and efficiency over fine-tuned compression, often relying on hardware encoders like NVENC or Quick Sync.
Codecs in Encoding
What is a Codec?
A codec is a tool that compresses and decompresses video or audio files. It makes large media files smaller for storage or streaming and then restores them for playback. The word “codec” comes from "coder-decoder."
Popular video codecs used in encoding include:
- H.264 (AVC)
- H.265 (HEVC)
- AV1
- VP9
- ProRes
- DNxHD / DNxHR
- MPEG-2
- VP8
- Theora
- Xvid
H.264 is the most widely supported and used, while AV1 is a newer, royalty-free alternative offering better compression.
What is Decoding?
Decoding is the process of converting compressed video or audio data back into a viewable or playable format. It’s the reverse of encoding.
When a video is streamed or played, the device (like your phone, computer, or smart TV) uses a decoder to unpack the compressed data created during encoding. The decoder reads the encoded file, reconstructs the frames, and outputs the video and audio in real-time.
For example, when you watch a video on YouTube, the file has been encoded using a codec like H.264. Your browser or app uses a decoder (software or hardware-based) to decode the video so you can watch it smoothly.
Hardware Encoders vs Software Encoders
Encoding can be performed by software or hardware encoders.
Software encoders are applications you install on your computer that capture your video input, compress it, and send it to streaming platforms like YouTube, Facebook, or Twitch.
Hardware encoders are dedicated physical devices built specifically to encode live video. Some models can connect directly to a camera to handle encoding on the spot.
What’s the main difference between these two, and which one is better? It mostly depends on the streaming needs and the type of content used. Let’s start comparing to clarify.
Software Encoders
Software encoding is performed using the CPU and encoding libraries, such as x264 (for H.264) or x265 (for H.265/HEVC). It provides fine-grained control over encoding settings such as bitrate, compression level, frame types, and quality.
Pros:
- Higher-quality output at lower bitrates (better compression efficiency).
- Advanced tuning options for specific use cases.
- Often used in professional video production or broadcasting.
Cons:
- CPU-intensive and slower, especially for high-resolution content like 4K.
- Not ideal for real-time applications unless you have a very powerful processor.
Used for: Video editing, VOD encoding, professional exports where quality is the top priority.
Hardware Encoders
Hardware encoding is done using dedicated chips (ASICs) or GPUs with built-in encoders like NVIDIA NVENC, AMD VCE, or Intel Quick Sync Video. These are designed to handle video encoding tasks much faster and with lower power consumption.
Pros:
- Fast and efficient encoding that’s ideal for real-time applications like live streaming or video conferencing.
- Offloads work from the CPU, freeing system resources for other tasks.
- Consistent performance even under heavy system load.
Cons:
- Slightly lower output quality at the same bitrate compared to software encoders.
- Less flexible in terms of advanced settings and codec tuning.
Used for: Live streaming, surveillance systems, edge devices, mobile devices, embedded systems.
In Context: Streaming and ABR (Adaptive Bitrate Streaming)
In streaming, especially with adaptive bitrate streaming, the encoder must create multiple renditions of the same video. This means creating several versions of the same video at different qualities (like one in high quality (1080p), one in medium (720p), and one in low (480p)). Each version has a different resolution and bitrate.
Now, these renditions are switched dynamically based on the viewer’s internet connection and device performance.
- Software encoders can optimize quality for each rendition but may struggle with real-time encoding of all renditions simultaneously.
- Hardware encoders excel here because they can encode multiple renditions in real-time, making them ideal for live ABR workflows (e.g., live sports or events streamed to a global audience).
Final Comparison Table
| Feature | Software Encoder | Hardware Encoder |
|---|---|---|
| Speed | Slower | Much faster |
| Quality | Higher (per bitrate) | Slightly lower |
| Customization | Very flexible | Limited |
| Resource Usage | High CPU usage | Low CPU, offloads to GPU |
| Best for | VOD, post-production | Live streaming, real-time use |
How Does Encoding Work?
So far, you’ve read about the encoding types, codecs, and adaptive bitrate. Now let’s see how all these cooperate to make encoding possible.
Here is how encoding works in 6 steps:
Step 1. Capture the Raw Video
Video encoding begins when a device, such as a camera or screen recorder, captures raw, uncompressed video. This raw footage contains every detail in full quality, but results in extremely large file sizes.
For example, one minute of 4K uncompressed video can take up dozens of gigabytes. So, it needs to be shrunk down for streaming, sharing, or storing.
Step 2. Choose an Encoder and Codec
To compress the video, you need an encoder (software or hardware: scroll down to learn about each) and a codec (like H.264, H.265, or AV1).
The encoder applies the codec’s rules to reduce the size of the video. For instance, if you use the x264 encoder with the H.264 codec, it will process and compress the video accordingly.
Step 3. Compress the Video
Next, the encoder analyzes each frame of the video. It removes redundant data, smooths out similar pixels, and stores only what changes between frames. For example, in a scene where the background remains still, the encoder won’t repeatedly store the same background—it will reuse the data, saving space.
This compression significantly reduces the file size without making a noticeable impact on visual quality.
Step 4. Set Output Parameters
Before finalizing the file, the encoder uses your chosen settings: resolution (e.g., 1920 × 1080), frame rate (e.g., 30 fps), and bitrate (e.g., 5 Mbps). These settings control the amount of data used per second of video and directly affect quality and file size.
For instance, a higher bitrate produces clearer video, but it also creates a larger file.
Step 5. Package the Encoded Video
Once compressed, the encoded video is placed into a container format like MP4, MKV, or MOV. The container bundles the video, audio, subtitles, and metadata into one playable file.
For example, an MP4 file can include an H.264 video track and an AAC audio track, making it compatible with most devices and platforms.
Step 6. Deliver the Video
The final encoded video is now ready for delivery—whether that's for uploading to YouTube, live streaming on Twitch, or storing on a server.
Streaming services may further encode the video into multiple renditions (like 1080p, 720p, 480p) to support adaptive bitrate streaming, so users get smooth playback regardless of their internet speed.
Example: A YouTuber records a 4K video using a DSLR camera. The raw file is over 50 GB, it needs to be compressed. They open HandBrake (a software encoder), choose the H.264 codec, set the resolution to 1080p, bitrate to 8 Mbps, and export it as an MP4. The resulting file is just 1.5 GB and ready to upload to YouTube with minimal quality loss.
Encoding vs Transcoding
What is Transcoding?
Transcoding is the process of converting an already encoded video or audio file into a different format, resolution, or bitrate. It’s used to make media compatible with various devices, reduce file size, or prepare it for streaming.
Encoding is often confused with transcoding, but the difference lies in the source: encoding is the initial compression of raw footage, while transcoding converts an already encoded video to another format, resolution, or bitrate. So, they are two distinct steps that follow one another in the same process.
Comparison Table
| Feature | Encoding | Transcoding |
|---|---|---|
| Definition | Compressing raw media into a digital format | Converting already encoded media into a new format |
| Input | Raw video/audio (e.g., from camera or screen) | Encoded video or audio (e.g., MP4, MKV, etc.) |
| Purpose | Initial compression for storage, playback, or upload | Format change, bitrate adjustment, or resolution shift |
| Common Use | Creating original video files | Adapting videos for streaming, editing, or devices |
| Example | Encoding raw 4K footage into H.264 MP4 | Converting H.264 1080p to H.265 720p for streaming |
Frequently Asked Questions
Content Writer
Anush Sargsyan is a content writer specializing in B2B content about OTT streaming technologies and digital media innovation. She creates informative, engaging content on video delivery, OTT monetization, and modern media technologies. The goal is to help readers easily understand complex ideas. Her writing is the bridge between technical detail and practical insight, making advanced concepts accessible for both industry professionals and general audiences.
Related terms

AVOD (Advertising-Based Video on Demand)
Explore how AVOD works, its monetization model, and why it's popular for free streaming platforms. Read the full definition on inorain.com glossary.

CSAI (Client-Side Ad Insertion)
Learn how CSAI delivers ads through the video player, enabling targeting, tracking, and monetization.
